Wednesday, November 30, 2011

Painting Poinsettias

Digital painting is one of my favourites, in real life I am hopeless with brush and paint except for creating backgrounds. This challenge is to paint a poinsettia.  The image I will be using can be downloaded at
http://www.decoart.com/cgi-bin/Projects.cgi?Poinsettia2011 there is also a pattern for this painting which you can down load as well.  Trudy Beard has kindly given permission to use her painting and pattern, so if you are going to use it please acknowledge her in your credits.

I have also found a clip art image that is free to use.  http://www.christmas-clipart.com/free_christmas_clip_art_images/poinsettia_flower_drawing_with_poinsettia_text_0515-0912-1115-3025.html  you may like to use.

If you may have a favourite image that is okay. I have written this tutorial in Photoshop Elements 9 and refrained from using my painting programs and exotic filters.

The technique I favour in digital painting is to create a line drawing of the image and paint the individual elements.  So lets get started.  I have selected the main flower in Trudy's painting, and to even out the composition I added a leaf .  The following file is in PNG format if you wish to use the pattern, but I will be creating layers with the individual line drawings.


Also download the painting, in the following image I have cut and pasted the main flower into a different background.  It will be your choice as to whether you paint all three flowers.

I will leave a colour swatch at Digital Whisper for your use.


Step 1. Download your image of the poinsettia and cut and paste the image into a new document, create a new layer above the flower and fill with 50% grey and lower the opacity to around 70%
Step 2. Create a new layer and beginning with the lower left hand leaf with a hard round brush at about 3-5 pixels and colour fl7 from the colour swatch (47402d)  trace around the leaf.


Before proceeding to the painting of the leaf, I want to discuss painting techniques and brushes.  I always begin with the darkest colour and a low opacity and then gradually increase the opacity with paint strokes.  I will then add other colours again at a low opacity.  This way you can control the build up of colour.  I also will smudge every now and then to "move" colour and blend.  I also will add a a small colour palette on the layer I am working on and it is here that you can blend colours to use.


Brushes.  There are a lot of speciality brushes that can be downloaded, but I use those in the default brush set and may vary the brushes properties. #23,  #63 and 66 are ones that I use most of the time with a splatter brush.  When I use the smudge tool I will use one of these brushes.  The size of the brush can be varied to suit the painting.

Step 3 Begin painting your leaf, gradually changing colours.  To check your progress hide the flower layer. You do not want the transparent layer showing, although sometimes I do leave the original painting underneath.


As the coverage is not 100% I will continue to add colour and blend.

Step 4. When you have added your final details it is time to see how accurately you have painted.   I lower the opacity of the painted leaf layer, and add a mask layer, and clean up the edges using the original painting as a guide. Note: you can hide the grey layer until needed for the next step.


Step5 Repeat steps 3 and 4 for the remainder of the painting.  I look to see which elements are in the background and paint these in order.  Also look at your painting for light and shadow.

Here, in the image below I have completed the leaves from around the left-hand-side to the lower right and have three leaves to paint, plus the flower petals.


Remember this is your painting and your style maybe different from mine.  Have fun with your painting and I will post my completed painting at a later date.  Remember that there are a variety of standard filters in Photoshop to use. Play with opacity and blending settings. You can also choose your own background in which to place your flower.

There are numerous ways to digitally paint and I am sure your will find one that suits your style.

Any questions please ask.

Cheers

Wednesday, November 16, 2011

How to create a Genie

In this tutorial we will take an image of a dancing girl and convert her into a Genie.  I have added some sources for you but you may have a favourite that you wish to use.  The tutorial is just to create the genie as you will want to place in her in your own special background.  The background I have supplied is useful to see how your genie is developing.

Sources for Genie
http://chamberstock.deviantart.com/art/Belly-Dancer-Stock-11-100993854
http://mjranum-stock.deviantart.com/gallery/1854072

You may need to be a member of Devianart to view and download the images. If you use a Devianart image or any image other than your own, please abide by the artist's rules and acknowledge their creativity.

Smoke Brushes
http://www.brusheezy.com/brushes/1830-Real-Smoke-Photoshop-Brushes

Background and bottle


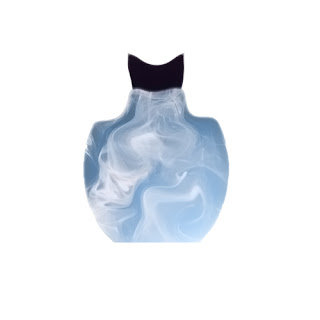
PNG image of Bottle

Step 1 Open the background and duplicate
Step 2 Isolate your genie from her background and place her on your background

Step 3 Add a layer mask and using a soft brush at about 65px brush away her bottom section into a V shape


Step 4 Add a new layer (white) and with a soft brush using white brush over figure, change blending to Overlay and opacity of 60 %. Add another layer (pink) and using colour F3a1b8 brush over figure and change blending to Overlay and opacity 60%.


Step 5 Now we are going to add four new layers of smoke, select any style of smoke brush and layer over the figure, change blending mode to overlay, as you add the next three layers change the type of brush and keep the blending as overlay. You may find that you only want a couple of smoke layers that is okay, also only use one brush stroke per layer that way you can control the build up.  Merge all the smoke layers, keep blending as Overlay.  Now add a layer mask and clean up any edges that you do not like, do not clean over figure.


Step 6 Now we are going to bend the smoke at the bottom as it will be coming out of a lamp or bottle.  To do this I used Filter/Distort/Liquefy/Warp, but you can also do this with the warp tool, I just do not have this tool in Elements.
Step 7 Move the figure up above the merged smoke layers


Step 8 Add a new layer and label "Final smoke". Using the smoke brush add smoke  mainly in the lower areas. Again bend and clean up the smoke.


Step 9.  At this point you can add new layers of stars, glitter or whatever you feel will add to your image.

Step 10 Add a lamp or bottle.  I will leave this to you to select, but have given you an image of a bottle that I made.

At this point do not save your work as a PJEG but do save as a PSD file so you can eliminate my background and insert your own.  In the next image I have changed my background and added an image of a girl.


You will see that I have added some pink highlights and clusters of stars.  The image is slightly different than the tutorial as I was playing around with different effects. The image below is without the background and I can now use this image in another setting.

Here I have put the Genie in my bottle and also given her a halo using an image of broken glass.


Enjoy, if you have any questions just let me know, also clicking on the images will increase the size.

Tuesday, November 1, 2011

How to Create a Snow Scene from Photograph


Creating a Winter Scene.

Step 1. Open your image and duplicate.

Step 2. Using the Dodge tool with a brush size of 41; Range Shadows and Opacity off around 90% start to brush on the roof tops  around the ground in front of the houses and into the trees, only do a little as you can go back and do more later this is just to get started, also brush over the lake.

Step 3. To hide the reflections in the lake, create a new layer (Layer 1). Using a default brush #100 (change size to 41px) and color b6b19d and opacity of 50% brush over lake, then increase the opacity to 90%  and go over lake again until the reflections are hidden.

Step 4. Using the dodge brush go over the lake but do not make it one solid colour.

Step 5.  Merge the background copy and the Layer 1. At this point I increased the size of the image to 8 inches x 6 inches  for the next step.

Step 6.  Open up Effects and use photo effects icon  (3rd from left)and click on the Blizzard icon and Apply. This will give an effect of snow. When you do this another layer is automatically added (Layer 1 Copy). Merge this new layer with the layer beneath.


 At this point go back and use the Dodge tool to add some more "snow", as you have increased the size of the image you will also have to increase the size of the brush.
Now we are going to add a snow layer, I used this tutorial:

With this tutorial, I used black to fill the new layer, as with all tutorials it does not always be exact.  I also use the Adjustment for the Brightness and Contrast. 

At this point I change the blending of the snow layer to Difference at about 40-38% opacity.  Change the blending on Layer 1 copy to Hard Light.  You can always use the dodge tool, but use caution rather than brush just click here and there until you are happy, remember you can always undo. Try a very large brush that covers the whole image (2000px) and one click.  

Also the background copy is not doing anything so turn this layer off.

You can play with the blending on your layers until you are happy. When you are happy, merge all layers.

I used the watercolour filter as one final touch.  One thing I do when playing is not merge all the layers but use Select/All, Edit/Copy Merge and Edit/Copy paste and move the created layer up to the top, this way you can undo before you make your final decision.


Wednesday, October 26, 2011

How to write an Artist's Statement

Kimmie has asked me to write about an Artist's CV, but I thought I would start with an Artist's Statement. Sometimes as artists we are required to write an Artist's Statement.  When is this required? Generally when you submit work for an exhibition.  Recently I had to write one for an exhibition, it was not easy and did a lot of internet research until I found one written by Katherine Tyrrell,  so I have taken her guidelines and paraphrased them below.

Here is a link to her work http://www.pastelsandpencils.com/fine_art.html take note of how she explains her work.


Artist's Statement

An artist's statement  explains your work and how you approach it.  It is a written statement that can be read by people viewing your work when you cannot be present at a gallery or wherever your work is on show (even on your blog/web site).  This is also important if you sell your work online or just want people who visit your blog/web site to understand your work.  What are the important aspects:

1. Be authentic by being yourself, say what you mean and not what you think  people want to hear. People want to know your work and who you are.

2. Keep it simple, use words people can understand, be concise and keep sentences short.

3.Use spell and grammar check.

4.Write it for the people you want to buy your work.

5. Write in the first person, think it as if you were talking to a person in reality.

6. Highlight the need to know facts - "who what when and why" Learn to say "I paint digitally". Identify what you produce (eg. fantasy, abstract, surreal paintings using digital techniques etc). Identify what your art is made of (photographs, textures etc.). Identify when you made your work. How long you have been working in your current media and what influences your work.

Explain your reason for your subject matter. For example "I am fascinated by colour, form and texture of ...."

7. Most importantly revise and review you statement as it will change over time.

Here is my draft of the statement I am writing for my entry:

Artist Statement
I am fascinated by how photographs can be manipulated by software technology into a different art form.  My inspiration comes from the landscape surrounding my home town of Berri, my garden, travel photographs and the art world (past and present).  I am always challenged by other artists and their techniques. The work on exhibit is influenced by the surreal work of Guiseppe Arcimboldo who extensively used fruit, vegetables and other objects in his paintings to resemble human portraits.

I prefer to create my backgrounds by using a software program that allows you "paint" digitally.  I also prefer to use my own photography, but will purchase images with the appropriate license from photography agencies.

I created the background to "Miranda" by digitally painting it and then modifying this painting with filters. The fruit and vegetables in her hair were photographed from weekly purchases from the supermarket. The technique I used was influenced by the Impressionist painting concept of small dots of colour. I created a square brush and eliminated parts of the model to bring the background, fruit and vegetables to the forefront. This idea came from a tutorial in a popular Digital Photoshop magazine.

"Miranda" is one in a series I have created this year.  The first in the series was created using a male model and seafood.


Miranda


Tuesday, October 25, 2011

Statement of Purpose

I have created this blog for the purpose of putting together a Statement of Purpose for Digital Whisper.  It became apparent to me that we do not have this Statement when I was putting together an Artists CV and I wished to include my experience at Digital Whisper for my "Informal Education".

We are all members of Digital Whisper for various reasons, for me it is a chance to learn and experiment among fellow artists (yes we are artists), I would like to hear from you as to the reason(s) you are a member and your experiences, and put together a Statement which you will have the opportunity to contribute to.  Cheers