Sources for Genie
http://chamberstock.deviantart.com/art/Belly-Dancer-Stock-11-100993854
http://mjranum-stock.deviantart.com/gallery/1854072
You may need to be a member of Devianart to view and download the images. If you use a Devianart image or any image other than your own, please abide by the artist's rules and acknowledge their creativity.
Smoke Brushes
http://www.brusheezy.com/brushes/1830-Real-Smoke-Photoshop-Brushes
Background and bottle

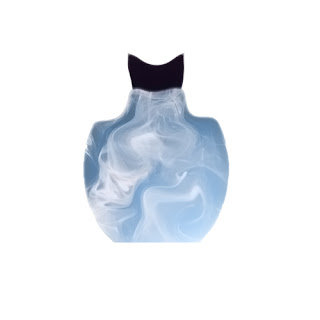
PNG image of Bottle
Step 1 Open the background and duplicate
Step 2 Isolate your genie from her background and place her on your background
Step 3 Add a layer mask and using a soft brush at about 65px brush away her bottom section into a V shape
Step 4 Add a new layer (white) and with a soft brush using white brush over figure, change blending to Overlay and opacity of 60 %. Add another layer (pink) and using colour F3a1b8 brush over figure and change blending to Overlay and opacity 60%.
Step 5 Now we are going to add four new layers of smoke, select any style of smoke brush and layer over the figure, change blending mode to overlay, as you add the next three layers change the type of brush and keep the blending as overlay. You may find that you only want a couple of smoke layers that is okay, also only use one brush stroke per layer that way you can control the build up. Merge all the smoke layers, keep blending as Overlay. Now add a layer mask and clean up any edges that you do not like, do not clean over figure.
Step 6 Now we are going to bend the smoke at the bottom as it will be coming out of a lamp or bottle. To do this I used Filter/Distort/Liquefy/Warp, but you can also do this with the warp tool, I just do not have this tool in Elements.
Step 7 Move the figure up above the merged smoke layers
Step 8 Add a new layer and label "Final smoke". Using the smoke brush add smoke mainly in the lower areas. Again bend and clean up the smoke.
Step 9. At this point you can add new layers of stars, glitter or whatever you feel will add to your image.
Step 10 Add a lamp or bottle. I will leave this to you to select, but have given you an image of a bottle that I made.
At this point do not save your work as a PJEG but do save as a PSD file so you can eliminate my background and insert your own. In the next image I have changed my background and added an image of a girl.
You will see that I have added some pink highlights and clusters of stars. The image is slightly different than the tutorial as I was playing around with different effects. The image below is without the background and I can now use this image in another setting.
Here I have put the Genie in my bottle and also given her a halo using an image of broken glass.
Enjoy, if you have any questions just let me know, also clicking on the images will increase the size.


I see one big difference in yours than mine. I stopped the smoke too short. Yours goes on up to almost her head. I stopped mine at about her waist. It would look better your way!
ReplyDeleteI enjoyed this! Thank you!
That is my pleasure.
ReplyDeleteThank you Kaylene for your tutorials. Hugs. Danièle
ReplyDelete